![iPost-GRADIENT-1.png]](https://www.ipost.com/hs-fs/hubfs/iPost-GRADIENT-1.png?width=100&height=43&name=iPost-GRADIENT-1.png)
Setting up a Journey Automation
- Navigate to https://g001.enterprise.ipost.com/automation/journey/446741
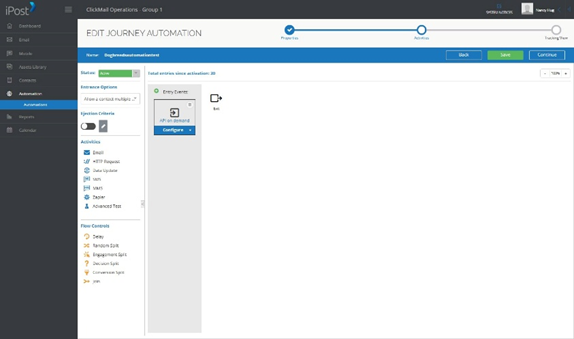
- Click Here.
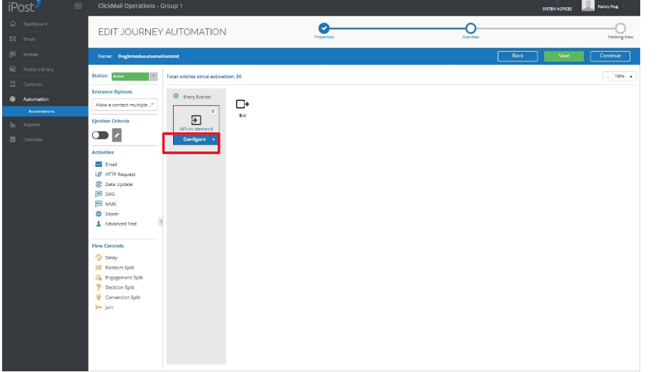
3. Click “List/Table”
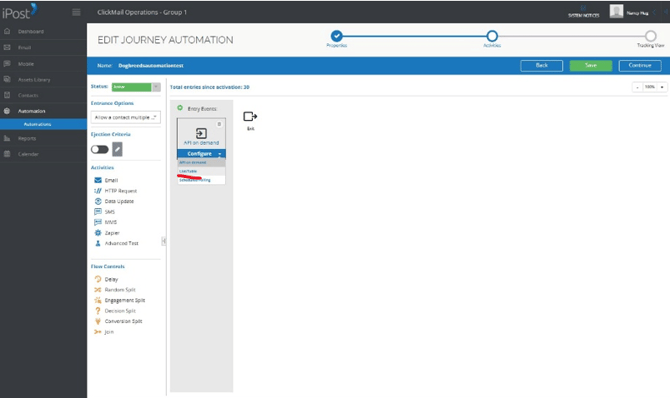
4. Click “Ok”
5. Find the folder where the database is located:
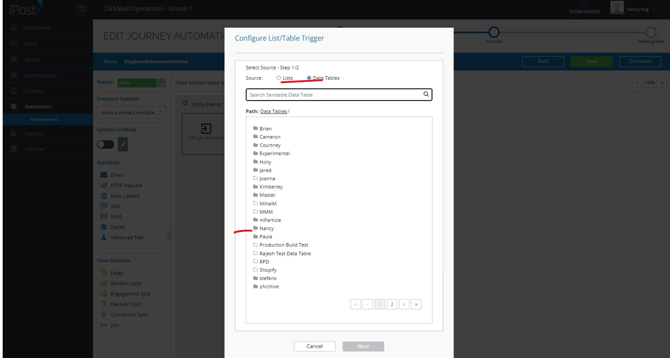
6. Select data table you’ll be referencing, i.e. Dog Breeds.
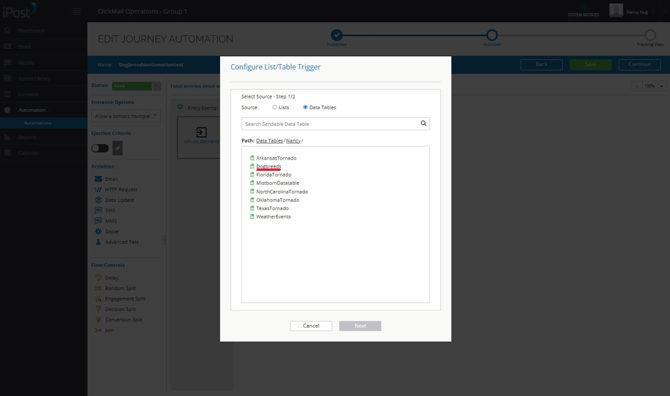
7. Click “Next”
8. Click the "all contacts from the data table and continue sending to new contacts that are added to the data table after the initial send" field.
9. Select “Done”
10. Select “Decision Split” and drag to the canvas.
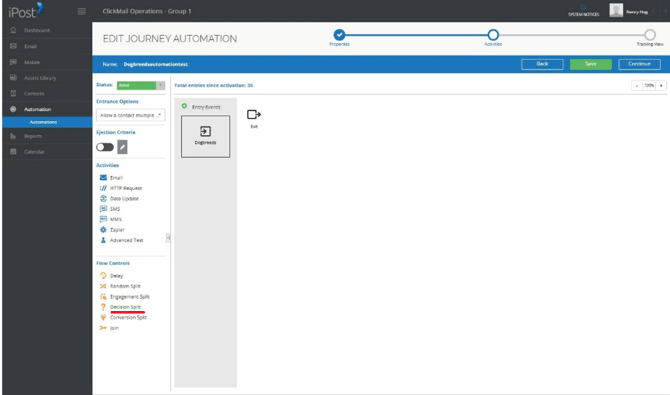
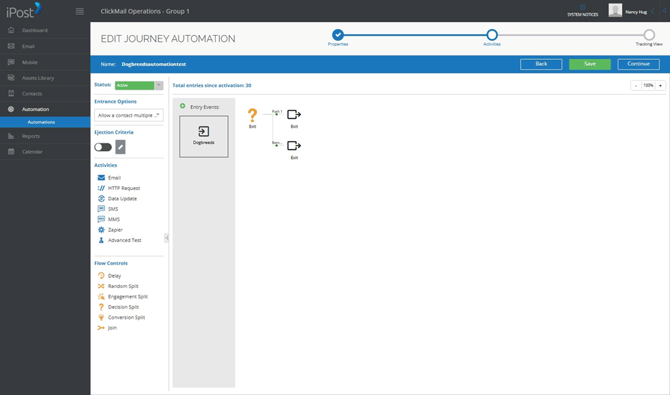
11. Click the editing pencil to create filters.
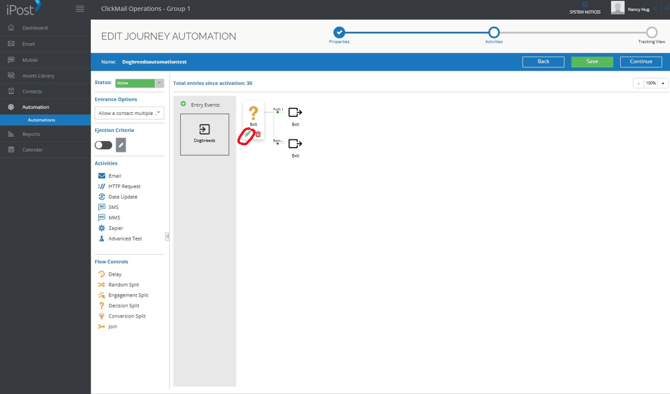
12. Click “select custom data tables.”
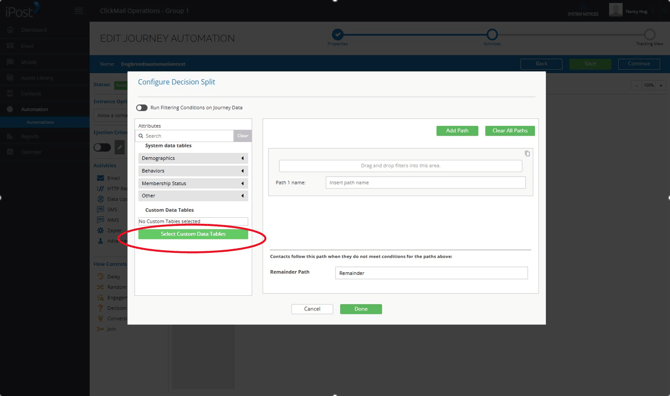
13. Click the folder with data table (in this case Nancy)
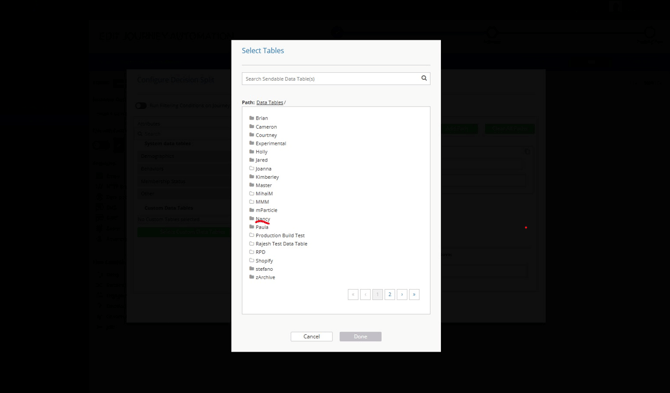
14. Select data table (in this case Dogbreeds)
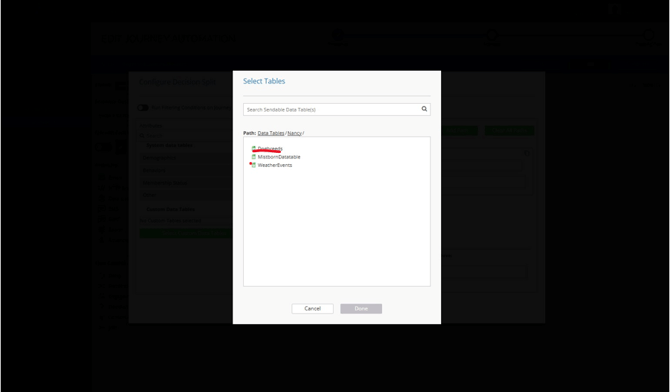
15. Click Done
16. Click the down arrow next to “Dog Breeds” to reveal attributes.
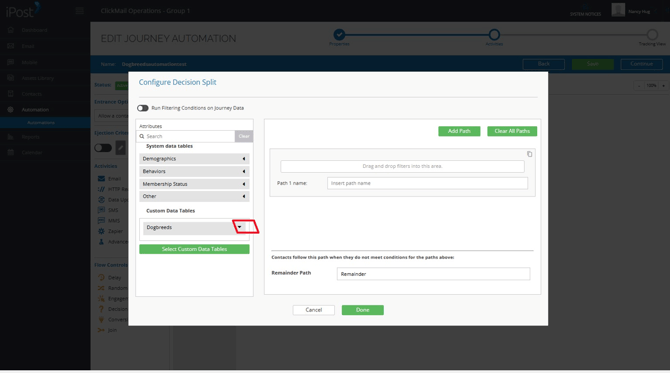
17. Click Weight and drag to canvas
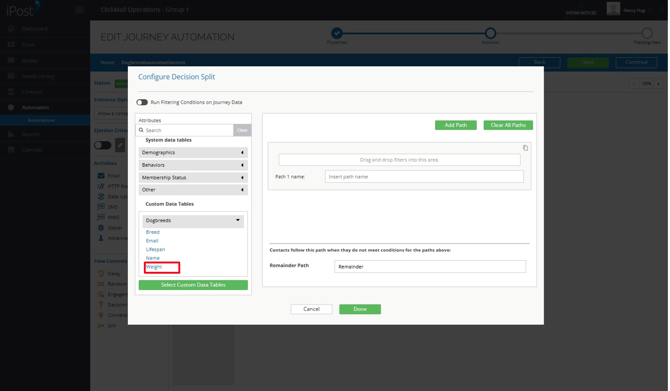
18. Click Down arrow.
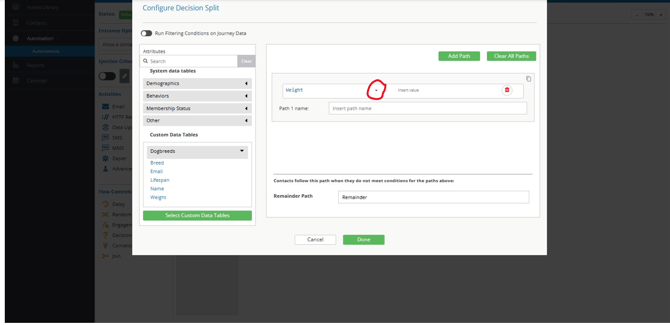
19. Select the modifier.
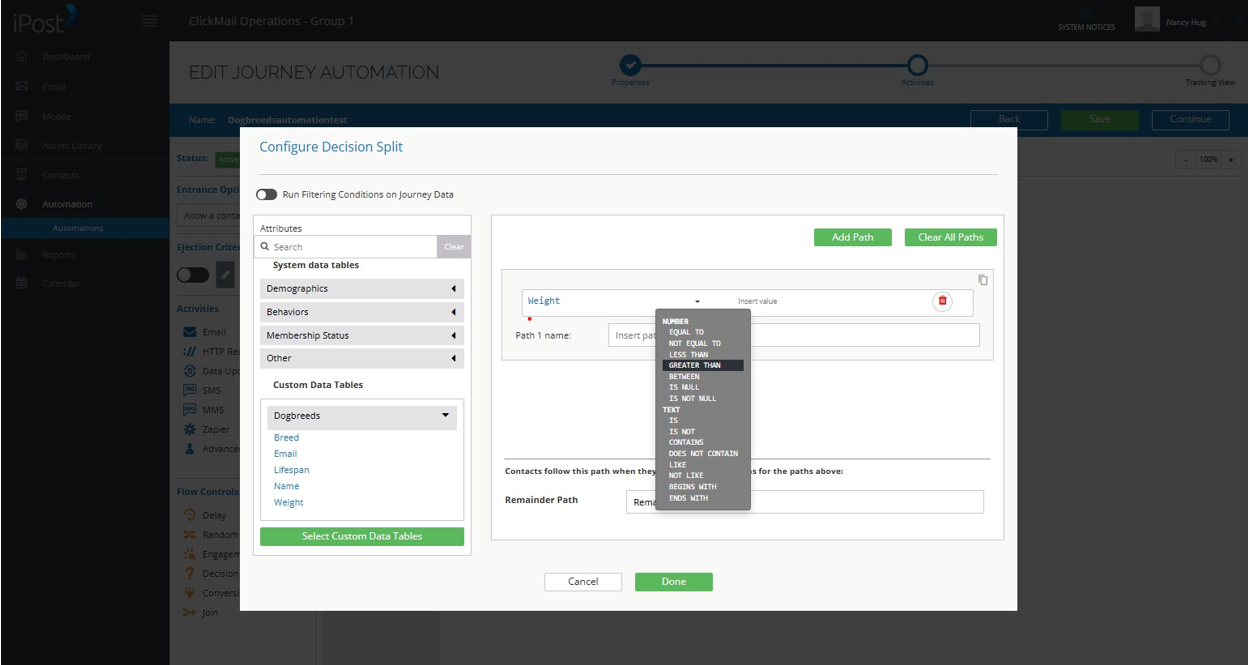
20. Insert value.
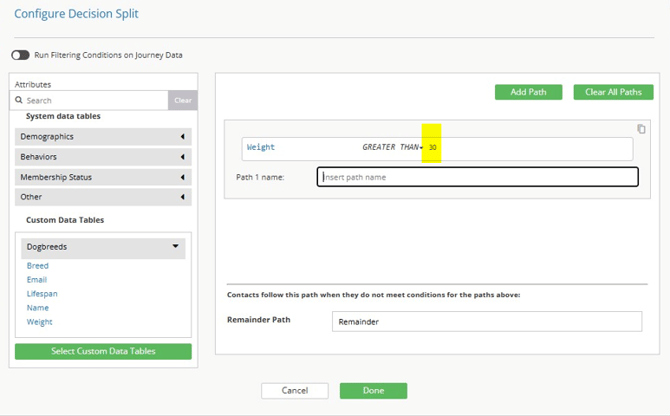
21. Add Path name. “If weight greater than 30 lbs, send first email.”
22. Contacts follow this path when it doesn’t meet the requirements.
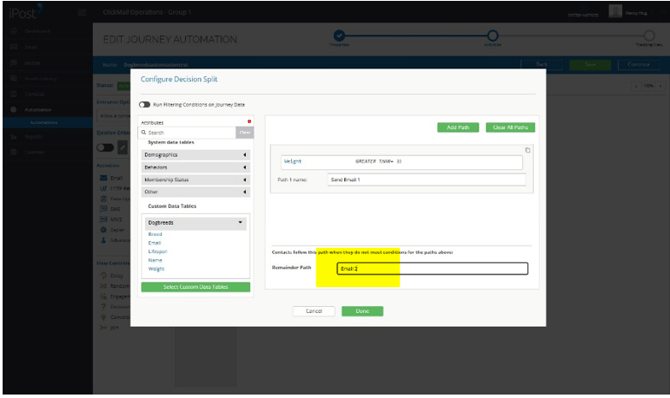
23. Click Done.
24. Drag the email icon onto the canvas.
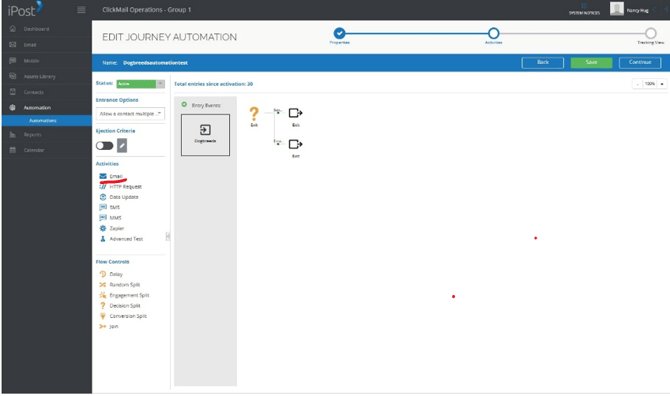
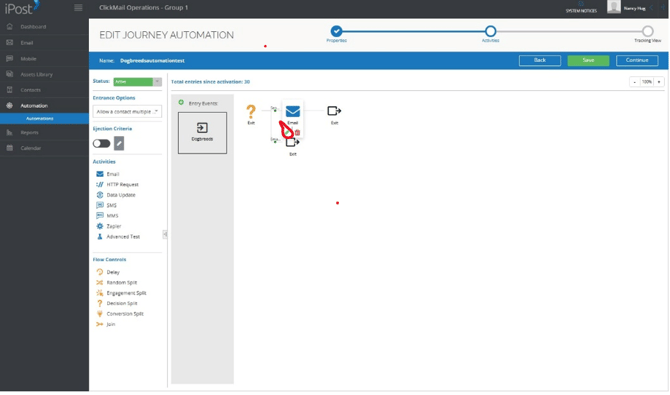
25. Click the pencil to choose the email you’ll be using.
26. Select the email:
27. First option will be low-fat dog foods for dogs over 30 lbs.
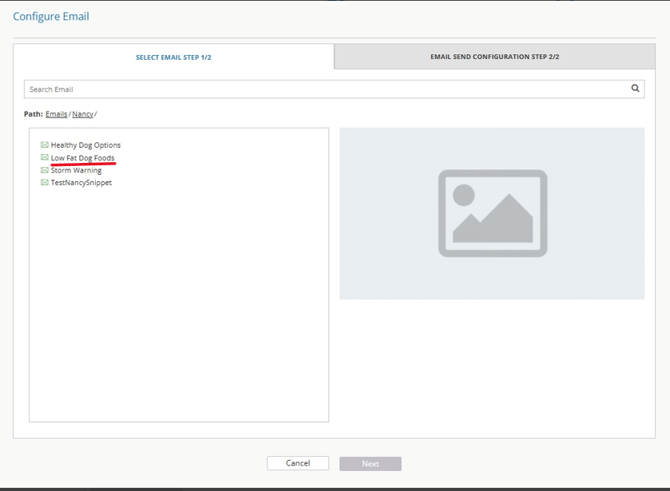
28. Click “Next”
29. Revise the “From Name” field.
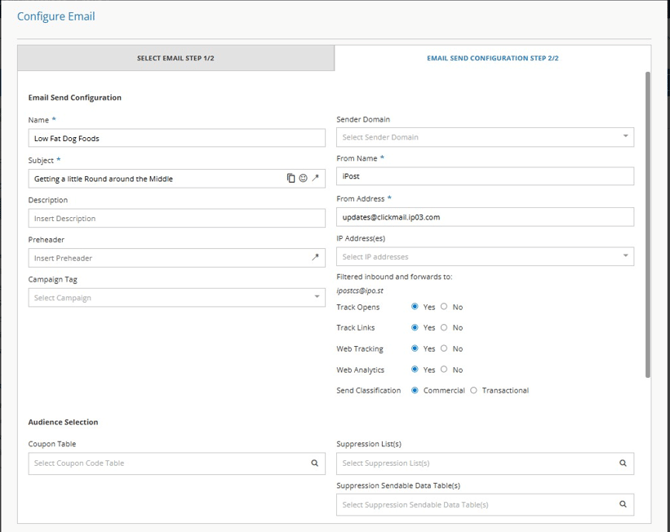
30. Click next.
31. Click confirm.
32. Drag another email to the alternate split.
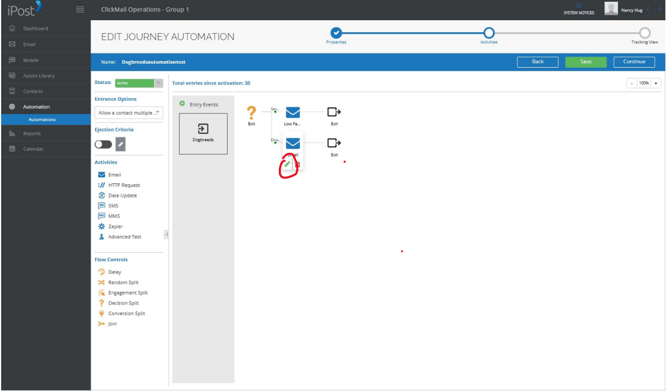
33. Click on the editing pencil to choose second email.
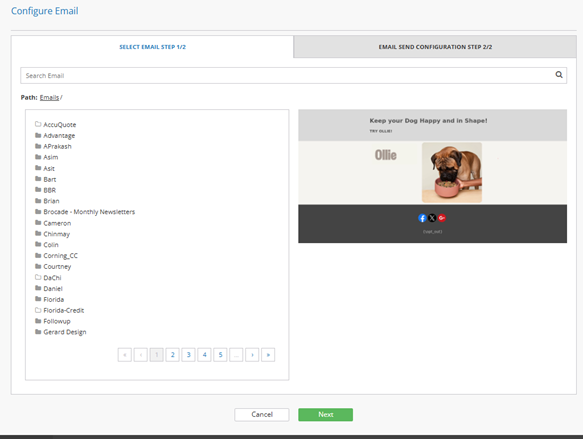
34. Select second email.
35. Save and then set to status “active” when ready.